Blog
Creating scene with Opacity maps and Planes
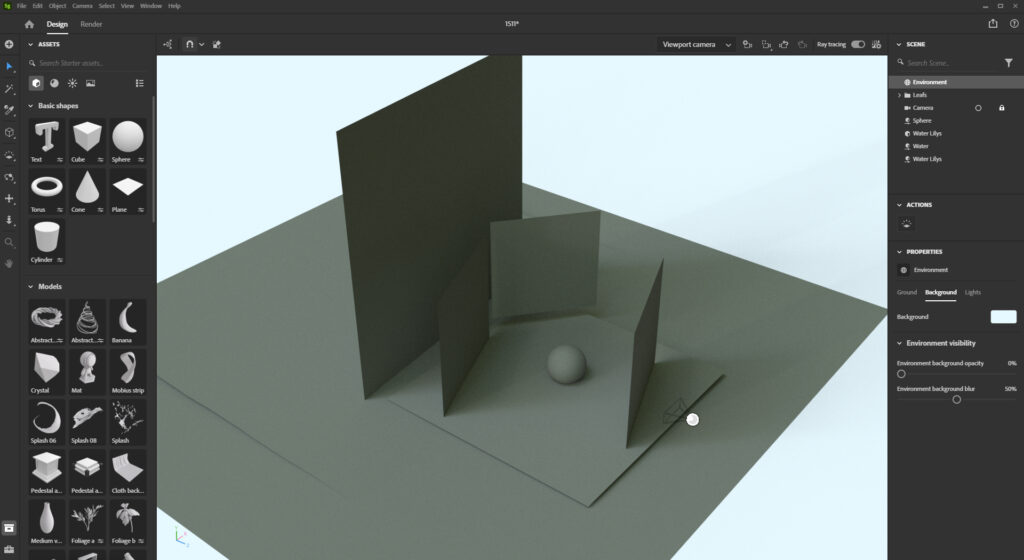
I wanted to try out a way to create complex looking scene with Stager in a way which isn’t taking too much resources from your PC and making your scene really heavy and hard to work with.
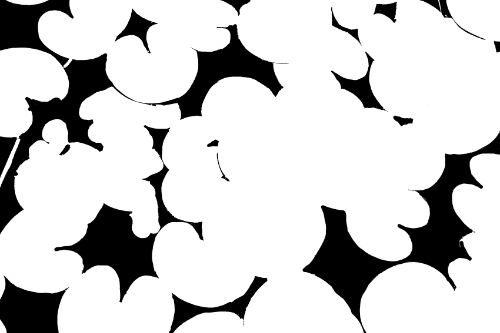
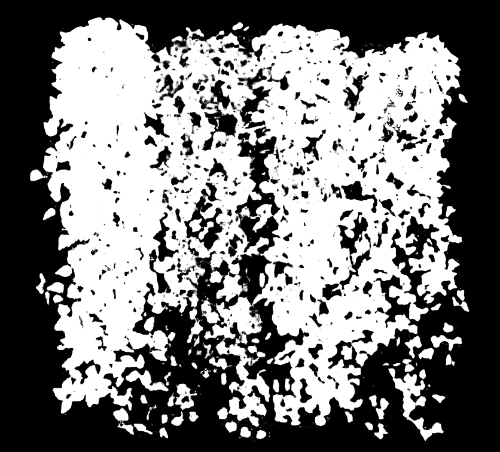
So instead of using complex models and textures including displacement, I used base image and created opacity out of it and applied those two into a plane.
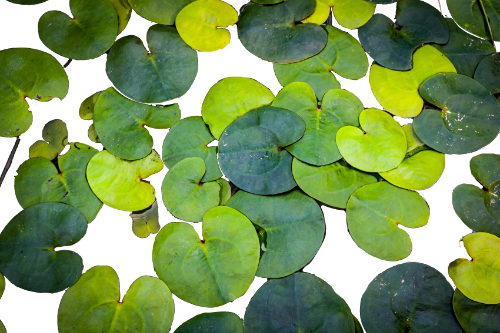
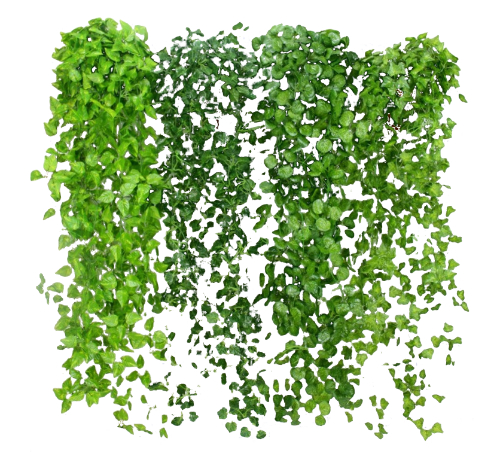
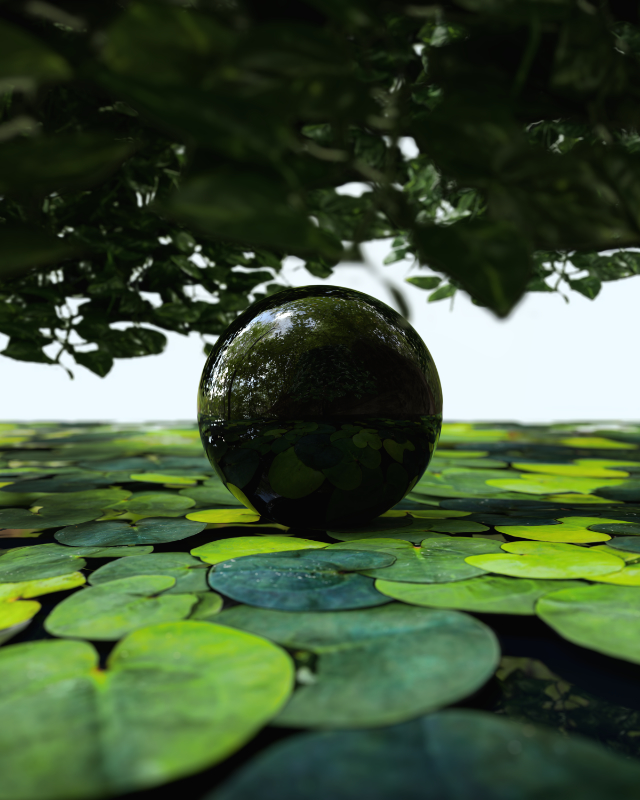
I set up my scene by placing four planes vertically and using the vines texture on them, and two on the ground using the waterlily texture. I finalized the scene with a plane which is using metallic surface mimicking still water surface, and some depth of field focus on the sphere.
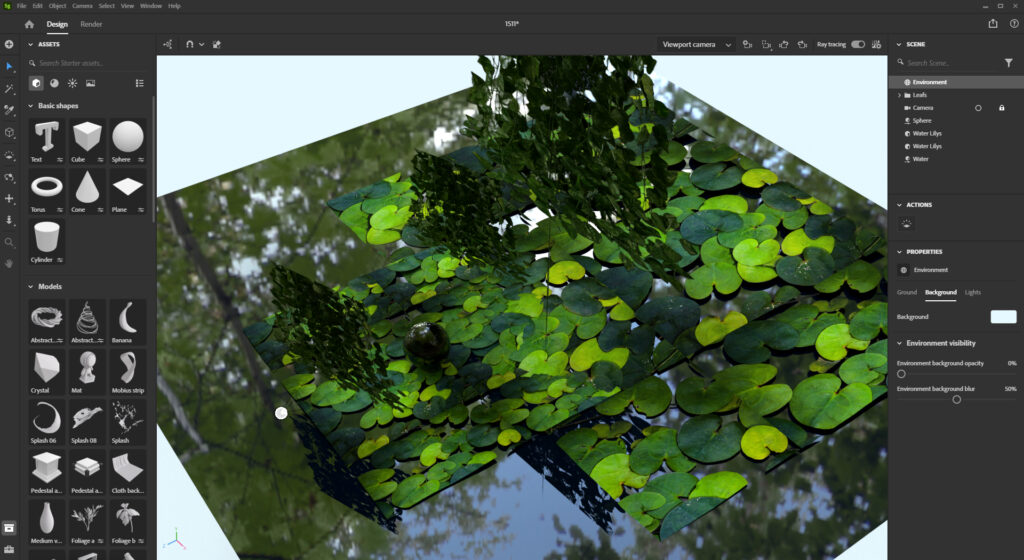
As you can see, the result is quite good even when I just used simple planes with image and a opacity map on them, this could be quite useful trick if you need to make a scene/mockup in a quick timeline, or if your PC’s struggling when using textures with displacement and high-poly models.
Material displacement
Adobe’s Documentation: https://substance3d.adobe.com/documentation/sg/material-displacement-238059934.html
With material displacement you can create details, bumps and other surface information onto your model with a grayscale image called a height map. When creating or using existing height map, take a note that the black/darker areas are lowered and white/lighter areas are raised.
If you want to use your height map in Stager, go to the Properties panel → Material → Height section where you apply the height map, then go to Object tab → enable displacement.
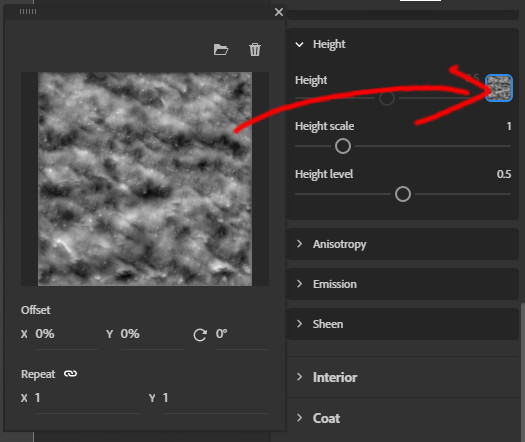
Height map options
Next thing to do is adjust your height scale/level.
Normally I only adjust the scale, and leave level to 0.5, more information about the height level on Adobe’s Documentation page.
Height scale represents the distance of the displacement, so in plain language the higher value will set the displacement/reach of the height more further away from the object.
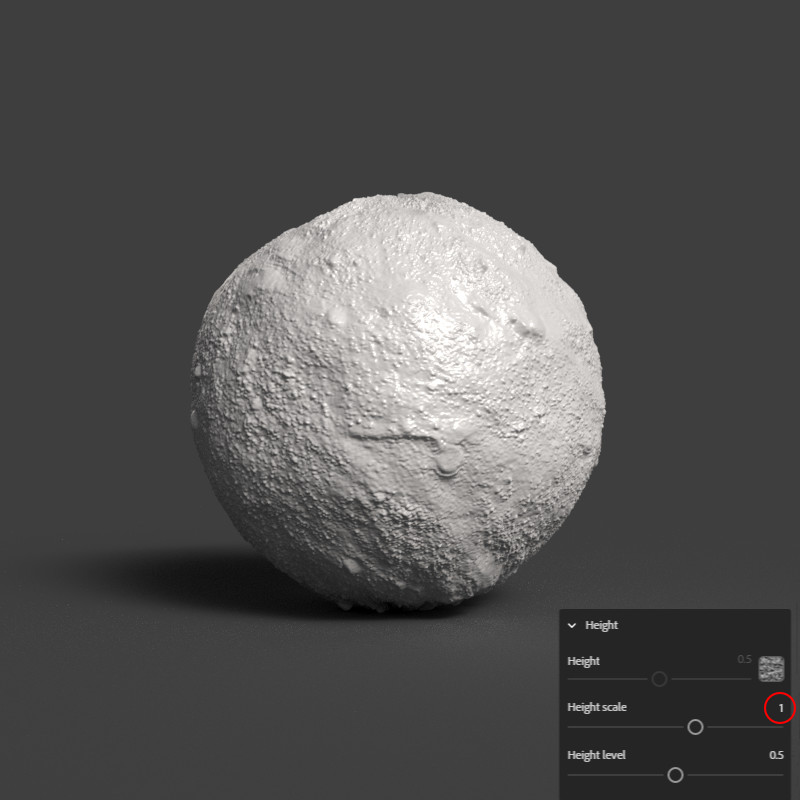
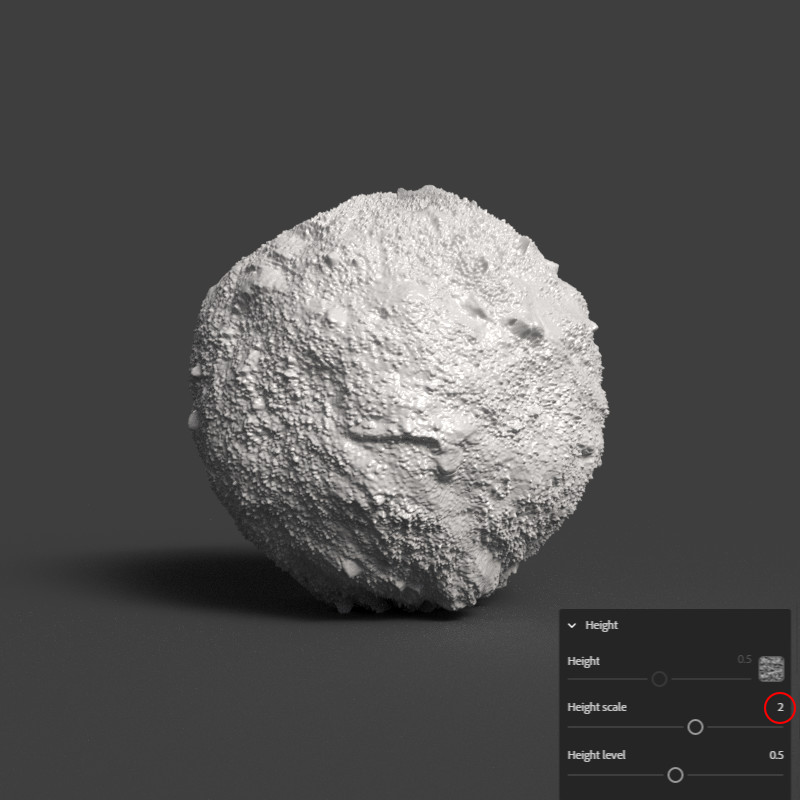
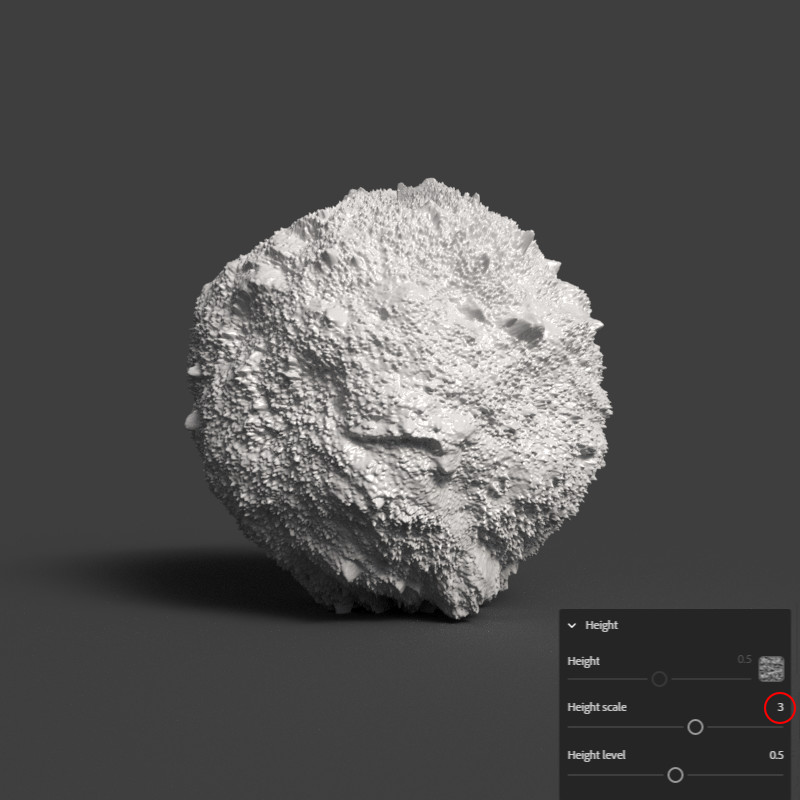
Height scales from 1. to 3.
Displacement tessellation options
Once you’re in the Object/Displacement panel, you need to enable Displacement and decide which Tesselation mode you want to use. I’ve been mainly working with per-triangle-fixed mode, here’s a take from Adobe’s documentation explaining the tesselation modes;
“Tessellation is a system which takes the original shape of the model and adds more geometry detail to it. Displacement works by offsetting the geometry surface, so if the model doesn’t have enough detail the displacement effect can appear coarse with artifacts and stretching.”
https://substance3d.adobe.com/documentation/sg/material-displacement-238059934.html
- Uniform (per-triangle fixed) will equally take every triangle on the underlying model and split it into new face. Each subdivision will increase the number of faces again.
- Uniform (total face budget) will also equally divide faces, but will stop once a maximum number of faces are created.
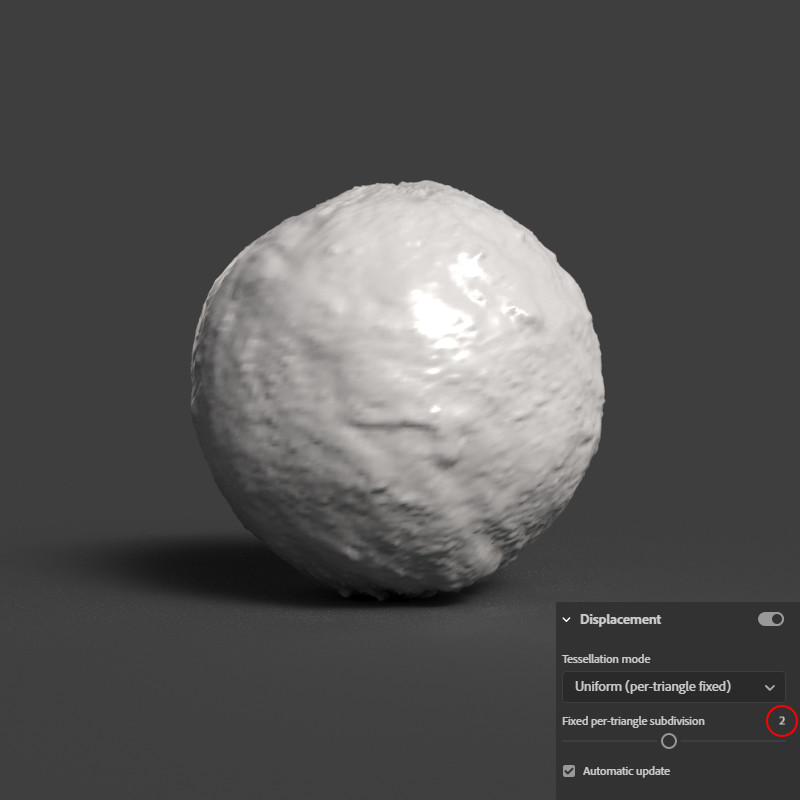
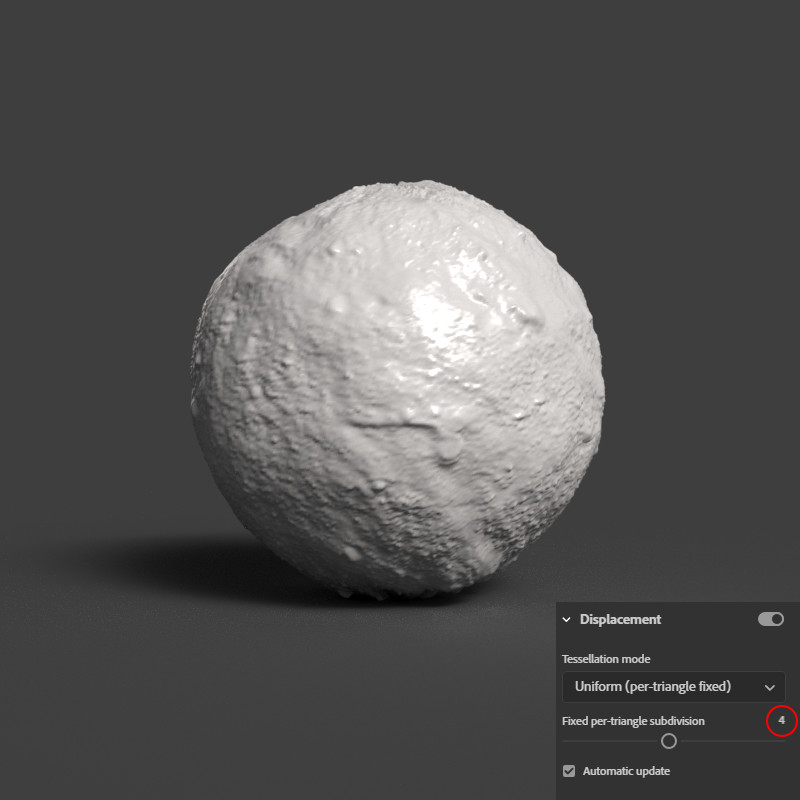
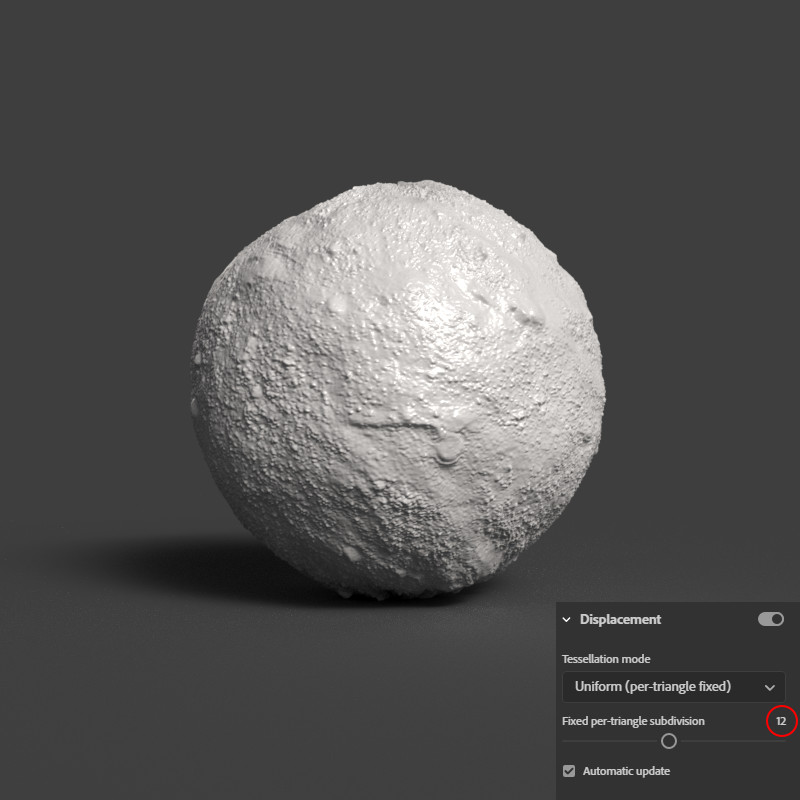
Per-triangle fixed subdivision set from 2. to 12.
As you can see, higher the per-triangle fixed subdivision value is, more detail you can get. But since each subdivision will increase the number of faces, the more your PC will use resources and your scene can get quite heavy so start adjusting it from lower values at first and see how high you can get.
If you have any questions about this or anything else, contact me or check out Adobe’s Stager Documentation page!